Under Project on the right panel, input the namespace’s name and click +
Remember to do this before adding anything to the namespace, in case you forget (it does not have a way to mass-move components between namespaces yet)
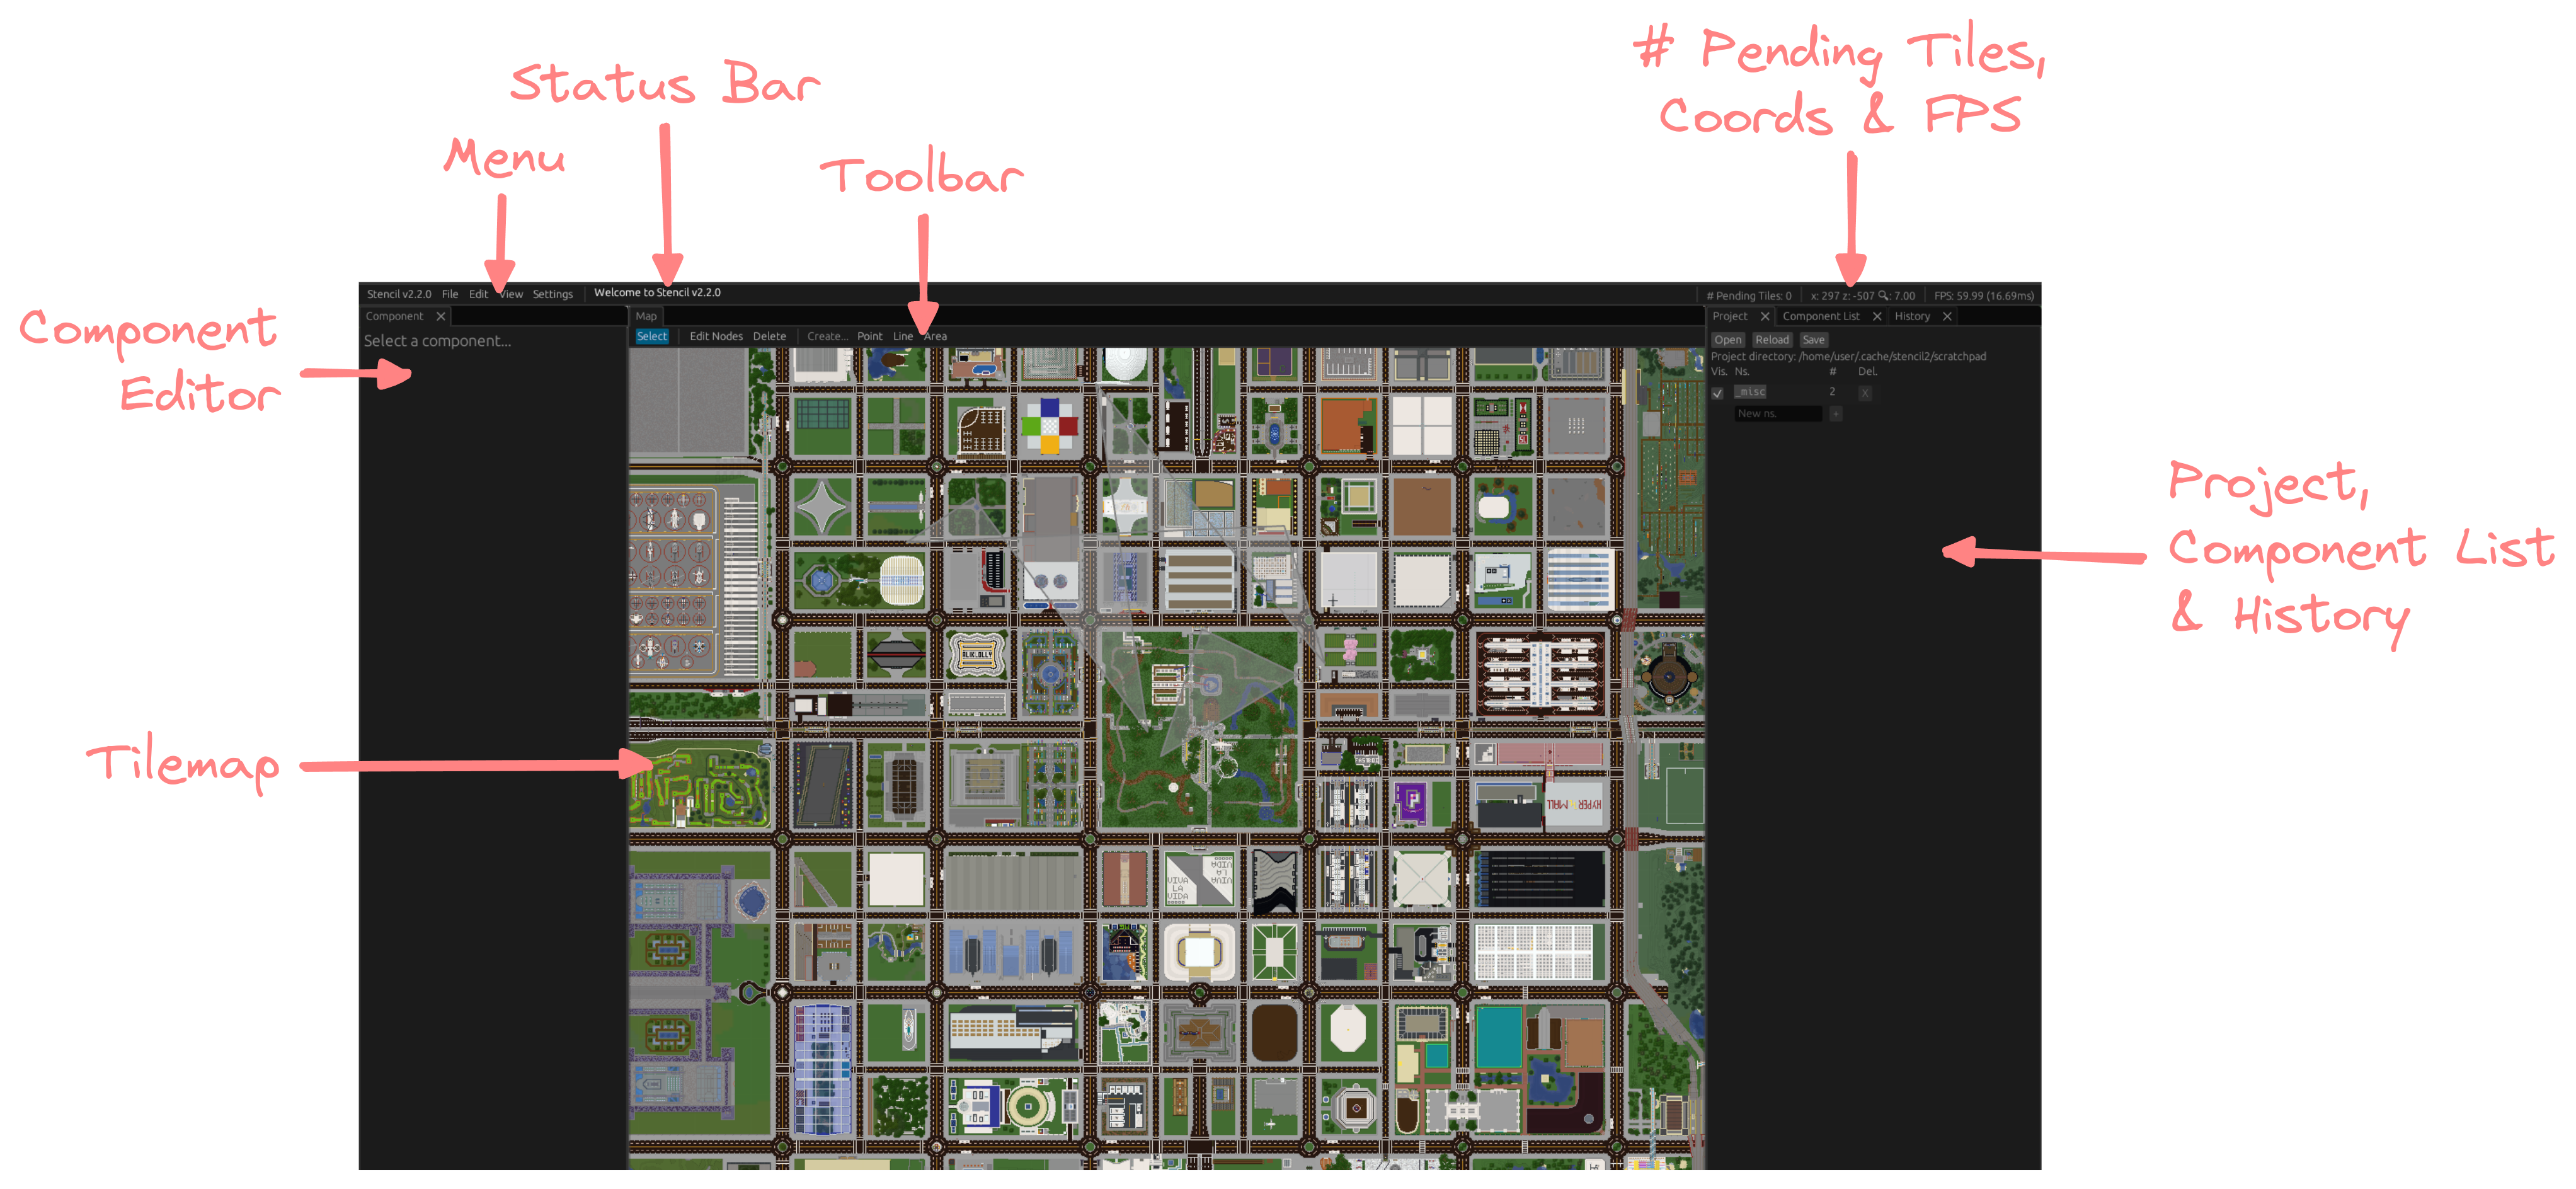
A panel of text boxes and sliders should appear on the left of the screen
ns. is the namespace that the component belongs to. It should be a three-letter code that your project organisers have assigned, or that you have registered
If you have just created a namespace, remember to set it (before)
This field should be automatically prefilled the next time you edit a component’s information
id should be prefilled automatically with a randomly-generated ID
Displayed as is the text that would appear on the final map
Description is a brief description of the component
Component type is what the component would show up as on the final map
Tags is a comma-separated list of tags on the component
e.g. oneWay makes a line one-directional
Layer controls whether the component appears below or above other components
In lines, Reverse direction reverses the order of the nodes. This is useful for one-directional components
A list of coordinates is shown as well below the information fields
In lines, the green coordinate points to the start of the line and the red coordinate points to the end of the line. Both these coloured coordinates point to coloured handles on the component on the tilemap